
Overview

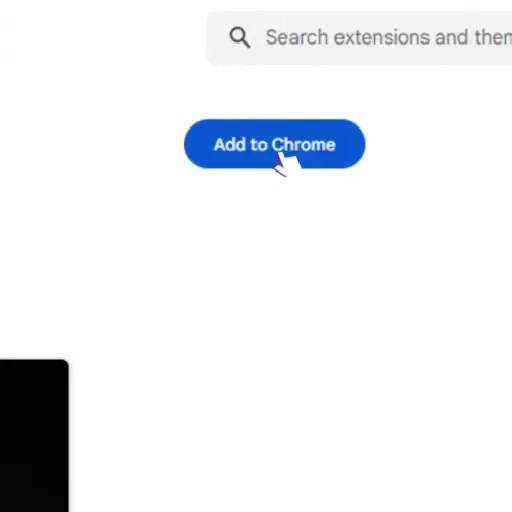
Solflare is a secure, beginner-friendly wallet for the Solana blockchain. It allows you to easily store, send, stake, and manage SOL and SPL tokens—plus access NFTs and dApps directly from your browser. In this guide, you’ll learn how to install the Solflare extension and create your first Solana wallet in just a few simple steps.

🤔 What’s Solflare?

Solflare is a web-based wallet and dApp browser built specifically for the Solana blockchain. It lets users:

  • Store and send SOL and SPL tokens

  • Stake tokens and earn rewards

  • Trade tokens with integrated swaps

  • View, manage, and transfer NFTs

  • Connect to dApps like Jupiter, Magic Eden, and more

💡 Solflare is a great alternative to Phantom, especially if you want a wallet with native staking tools and hardware wallet compatibility.

Prerequisites for this guide

Required prerequisites:

  • A desktop browser (Chrome or Brave recommended)

All prerequisites are marked with checkmarks for easy scanning.

What You'll Learn

  • What Solflare is and why it’s trusted in the Solana ecosystem
  • How to install the Solflare browser extension
  • How to create and secure a new wallet
  • How to protect your recovery phrase and set a strong password
  • What to do once your wallet is set up

Step-by-Step Instructions

Visit the Solflare website

Go to the official site: solflare.com
Click the “Download” button at the top right to access the browser extension.

Screenshot for Visit the Solflare website
Step 1: Visit the Solflare website

Download the Extension

You’ll be redirected to the Chrome Web Store or your browser’s extension page.
Click “Add to Chrome” or “Install Extension” to begin the installation.
Once installed, the Solflare icon will appear in your browser toolbar.

Screenshot for Download the Extension
Step 2: Download the Extension

Create a New Wallet

After installation, a new Solflare tab will open.

  • Click “I Need A New Wallet”

  • Solflare will begin the wallet creation process

🧠 If you already have a wallet, you can choose “I Already Have a Wallet” to import it with your recovery phrase.

Screenshot for Create a New Wallet
Step 3: Create a New Wallet

Save Your Recovery Phrase

Solflare will generate a 12-word recovery phrase.

  • Click “COPY” to copy the phrase to your clipboard (but don’t store it digitally!)

  • Write it down on paper or save it in a secure, offline location

  • Click “I SAVED MY RECOVERY PHRASE” to continue

⚠️ Never share this phrase. Anyone with access to it can steal your funds.

Screenshot for Save Your Recovery Phrase
Step 4: Save Your Recovery Phrase
⚠️ Important
  • Never share this phrase. Anyone with access to it can steal your funds.

Confirm and Set Password

  • Solflare will ask you to re-enter the recovery phrase to verify that you’ve saved it correctly

  • Then, you’ll be prompted to create a strong password (minimum 8+ characters, mix of symbols and numbers recommended)

Click “Create Wallet” once done.

🎉 You’re all set! Your Solflare wallet is ready to use.

You can now:

  • View your balance

  • Receive and send SOL or SPL tokens

  • Stake SOL

  • Connect to dApps and NFT platforms

Screenshot for Confirm and Set Password
Step 5: Confirm and Set Password

Frequently Asked Questions

Common questions about How to Create a Solflare Wallet (Beginner Guide) and how to use it effectively

Solflare is a non-custodial wallet built for the Solana blockchain. It lets users manage tokens, stake SOL, and connect to dApps securely.
Yes. Solflare is completely free to install and use.
Yes. Solflare offers a mobile app, but this guide covers the browser extension version.
Yes. Solflare gives you a 12-word recovery phrase when you create your wallet. This is the only way to restore your wallet if you lose access.
If you lose your phrase, you cannot recover your wallet. Always back it up securely—offline and private.
Yes. Solflare integrates with most major Solana apps including staking platforms, NFT marketplaces, and DeFi protocols.

This FAQ section is fully accessible. Use the keyboard to navigate through questions.